Moving an object in Godot is relatively simple. There are multiple approaches you can take to move objects. There are generic ways for all objects to be moved, however some nodes require different functionality to be moved. Such as the KinematicCharacter node. The reason for this is because it uses functionality for collision with slopes.
Moving an object using the AnimationPlayer node
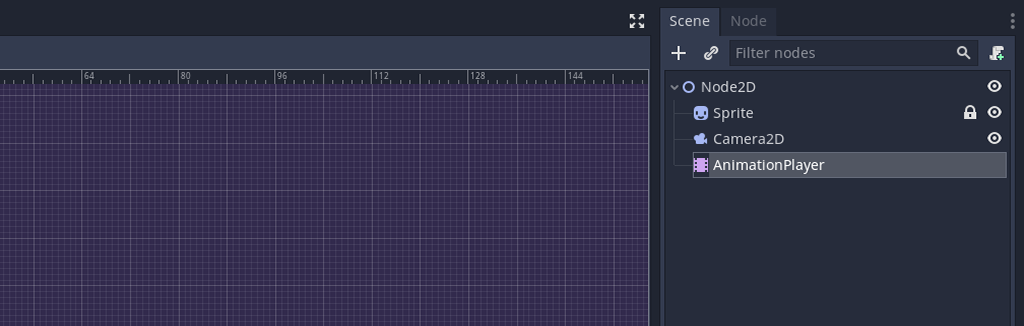
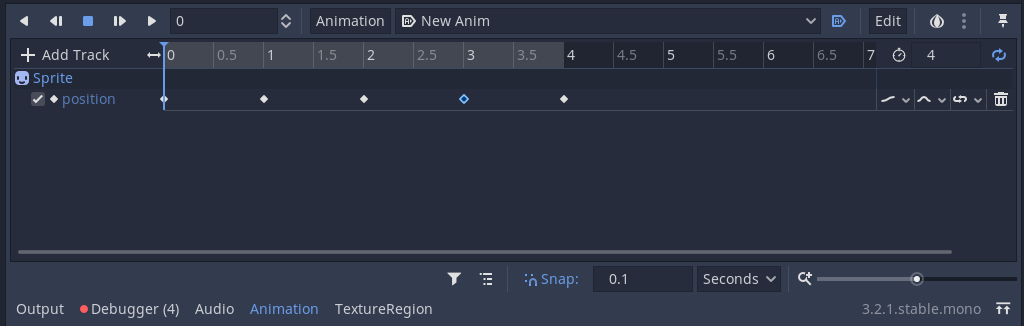
To start off simple, we will move a object without the need to write any code. You can simply do this by adding a AnimationPlayer node in the node tree of a object.
Add a new AnimationPlayer node you can do this by pressing the the + button and by selecting the AnimationPlayer in the node list.
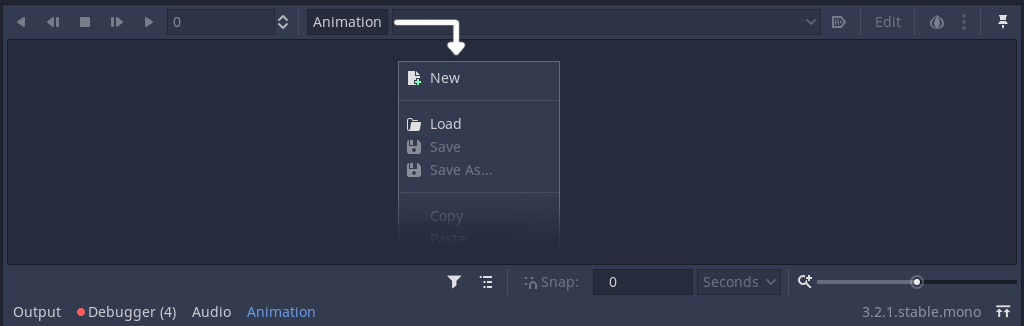
After you have selected the AnimationPlayer node, you can select the Animation tab at the bottom of the screen. Press the Animation button and select New to create a new animation.
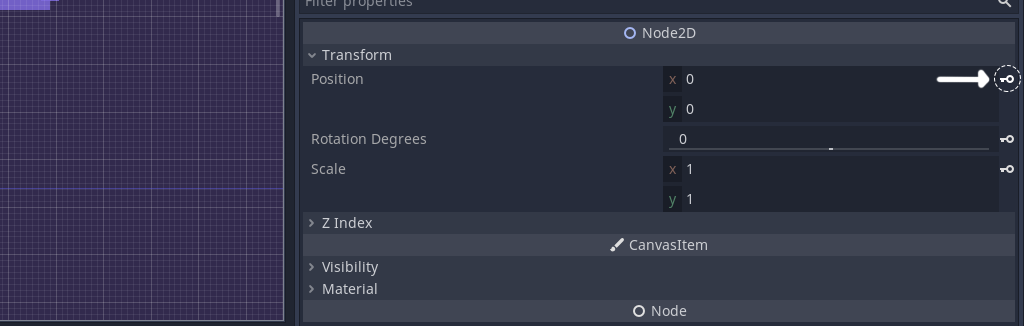
After you have created a new animation file. You now see key icons next to properties of other nodes. These are shown as long as the Animation window is open. So they may disappear if you select a node that is currently using a different window, you can easily switch back to the Animation tab to get it back.
Select the position key if you want to record the current position.
After keying the position, you can move the slider to the according time and do another key for the selected time in the animation tab.
Moving an object directly
The easiest way to move an object in Godot is by setting the position directly. This is done by setting the position property of a node. For a Node2D this will consist of a X and Y coordinate. For a Node3D this will also have a Z value.
self.position = Vector2(5,5) # Sets the position to X:5 Y:5
self.position.x = 10 # Sets the position of X to 10
self.position.y = 20 # Sets the position of Y to 20
Moving an object using move_toward
You can use move_toward(target, delta) directly on a Vector2 or Vector3 to move a vector to the same values as another vector. This can be useful if you want to move a value to a specific target at a fixed speed. For float values you can just call move_toward(a,b,t) without calling it on a vector.
# Moves to Vector(0,0) at a speed of 1 unit per second
var speed = 1 # Change this to increase it to more units/second
position = position.move_toward(Vector2(0,0), delta * speed)
Using linear interpolation to move an object
There are several methodologies to move objects between points. You can either choose to use the Tween node or to use code to move it between the points. Or you could use the lerp method to linearly interpolate the position of an object. Quite useful if you want to move an object between point a and b.
Ensuring it always meets the target.
First we get some points to move between. In this case I get the points based on the screen size. you could use any coordinates for these. This sample is based on the video above.
var point1 = Vector2(0,0)
var point2 = Vector2(0,0)

# Get points based on screen size
func _ready():
	var screenSize = get_viewport().get_visible_rect().size
	point1 = Vector2(screenSize.x * 0.1, screenSize.y * 0.6)
	point2 = Vector2(screenSize.x - (screenSize.x * 0.1), screenSize.y * 0.6)
Afterwards, I define a variable named time. Which I use to count time. Then I store the direction and total move duration. The main reason for needing the moveDuration is so we can tell how long it should take for the lerp to go from point a to b. The timeDirection just defines what direction time goes in. So we can move backwards. The time variable is what is used to execute the lerp between point a and b.
# Define basic variables and settings
var time = 0
var timeDirection = 1
var moveDuration = 2

func _process(delta):

	# Flip the direction of how time gets added
	# This ensures it moves back to its initial position
	if (time > moveDuration or time < 0):
		timeDirection *= -1

	# delta is how long it takes to complete a frame.
	time += delta * timeDirection
	var t = time / moveDuration

	sprite.position = lerp(point1,point2, t)
Bonus: Inverse lerp
It is worth knowing that inverse lerp also exists, this is useful if you want to know the % between two values. For instance, you have value 5 and value 15. How far is 7 between those values?
print(inverse_lerp(5,15,7)) # prints 0.2 to the console. Meaning 7 is at at 20% progress between 5 and 15.Move object using a tween node
The tween node is likely the quickest way to do any type of tween movement in Godot. Aside from using plugins. Which we will get to later. You can choose to add a tween them during runtime, or you can attach them directly to the node in the editor. In our case we add the node in GDScript.
func _ready():
	timeTween = Tween.new()
	add_child(timeTween)
After adding it, we can set the tween to interpolate between point1 and point2.
The interpolate_poperty method is as follows. (“target node”, “target property”, “pointA”, “pointB”, “transition timing”, “transition direction”)
func startTween():
timeTween.start()
spriteTween.interpolate_property( sprite, "position", point1, point2, 2,
Tween.TRANS_EXPO, Tween.EASE_IN_OUT)
# Wait until spriteTween has completed
yield(spriteTween, "tween_completed")
spriteTween.interpolate_property( sprite, "position", point2, point1, 2,
Tween.TRANS_EXPO, Tween.EASE_IN_OUT)
# Wait until spriteTween has completed
yield(spriteTween, "tween_completed")
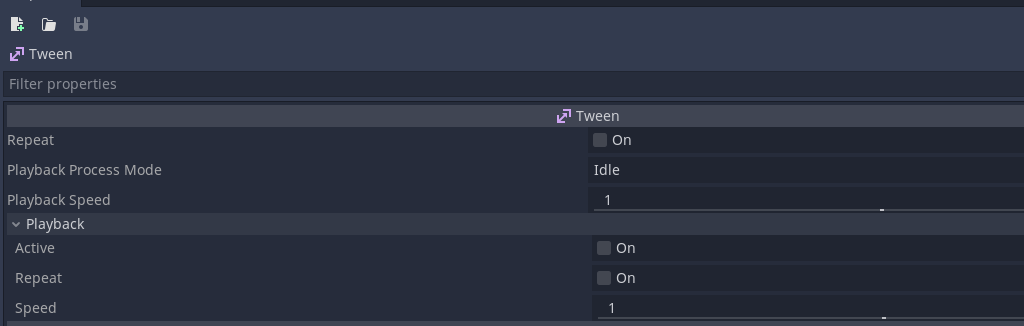
startTween() # This example loops infinitely until the node has been set free.There is only limited customization in the inspector, this means you are required to configure a Tween through code. One of the biggest benefits of using the Tween node is being able to set an ease type, and you can easily use yield or subscribe to a signal to get a callback for when a tween is complete.
If you are interested in all the available easing types. This website gives a good representation of the most common tween types. Personally I always come back to this site if I cant remember how a specific easing type works.
Moving an object using Path2D and PathFollow2D
Paths are a good alternative for tweens if you need a sequence of movements along a path. You can easily use them by Adding a Path2D node with a PathFollow2D node attached as a child of the node.
Creating a path in Godot is relatively easy. You create a Path2D node, afterwards you select it. Upon selection you will see additional options at the top of your 2D view. Ranging from “Select Points” to move any of your points directly. “Select Control Point” allows you to make curves. Afterwards there is an add point button, remove point button and close curve button to make it a full loop.
Afterwards, you reference the Path2D and PathFollow2D
onready var path = $Path2D
onready var pathFollow = $Path2D/PathFollow2D
Set some variables for defining how long it should take to traverse the path (traverseTime), how far the traversal is (t) and to store the pathLength.
var traverseTime = 5 # Time it takes to traverse the path
var t = 0 # Active time along the apth
var pathLength = 0 # Length of the path
First, we want to obtain the length of the path, you can easily do this by calling the following:
func _ready():
	pathLength = path.get_curve().get_baked_length()
Now that we have all the information we need, we can start configuring the PathFollow2D with a proper value that indicates how far along he is on the path. Based on the total length of the path and the time.
func _process(_delta):
	if (t > traverseTime):
		t = 0
	t += _delta
	pathFollow.set_offset((t/traverseTime) * pathLength)
One important notice of using Path2D and PathFollow2D, they are currently not synced to physics as long as this github issue is still present. So if you want to use the Path2D or PathFollow2D for platforms, I would advice to use animations instead. You could also choose to create a script that fetches the path within the “func _physics_process(delta):” method. This ensures it gets updated during the physics step.
Movement using KinematicBody2D
There are two methods you can use with KinematicBody2D to move around.
One is called move_and_collide(velocity) and another is called move_and_slide(velocity).
move_and_slide attempts to slide against a surface upon colliding, while move_and_collide does not have a standard response. In short, the move_and_slide is good for platforming games, while move_and_collide can be useful for a game like pong or breakout.
Move and collide : breakout code sample
As you can see in this sample. move_and_collide is used to fetch the active collision of the ball. It then uses the vector.bounce() method to change direction.
var collision = move_and_collide(velocity)

if collision:
	var meta = collision.collider.get_meta("Type")

	if (meta == "Player"):
		collision.collider._onballhit()
		velocity *= 1.01

	elif (meta == "Floor"):
		if (position.y >= global.screenres.y - 15):

			global._removeball()
			queue_free()

	elif (meta == "Brick"):
		collision.collider._explode()

	look_at(collision.position + -collision.normal)
	ani.play("bounce")

	$AudioStreamPlayer2D.stream = ballbounce
	$AudioStreamPlayer2D.play()
	var reflect = collision.remainder.bounce(collision.normal)
	velocity = velocity.bounce(collision.normal)
	move_and_collide(reflect)
Move and slide : Simple platformer code sample
In the code sample you can see I have chosen to use move_and_slide_with_snap what this method does is it ensures the character cannot overshoot when going over slopes. Another benefit is that it helps the character stay on fast moving platforms. The platforms are also using a KinematicBody2D and animator to move them. In order to let physics work properly on collision you have to have “Sync To Physics” toggled on on the platform. Another change I’ve had to add for platforms is to toggle the stick to slopes argument based on if the ground moves or not. This code has been partly taken from the Kinematic Character 2D demo.
extends KinematicBody2D

const WALK_FORCE = 1000
const WALK_MAX_SPEED = 85
const STOP_FORCE = 1300
const JUMP_SPEED = 250

var velocity = Vector2()

# This is set to 500 in this project
onready var gravity = ProjectSettings.get_setting("physics/2d/default_gravity")

func _physics_process(delta):

	var left = Input.get_action_strength("move_right")
	var right = Input.get_action_strength("move_left")

	# Horizontal movement code. First, get the player's input.
	var walk = WALK_FORCE * (left - right)

	# Slow down the player if they're not trying to move.
	if abs(walk) < WALK_FORCE * 0.2:
		# The velocity, slowed down a bit, and then reassigned.
		velocity.x = move_toward(velocity.x, 0, STOP_FORCE * delta)
	else:
		velocity.x += walk * delta

	# Clamp to the maximum horizontal movement speed.
	velocity.x = clamp(velocity.x, -WALK_MAX_SPEED, WALK_MAX_SPEED)

	# Vertical movement code. Apply gravity.
	velocity.y += gravity * delta

	var stopOnSlope = get_floor_velocity().x != 0 or get_floor_velocity().y != 0

	# Move based on the velocity and snap to the ground.
	velocity = move_and_slide_with_snap(velocity,Vector2.DOWN , Vector2.UP, !stopOnSlope )

	# Check for jumping. is_on_floor() must be called after movement code.
	if is_on_floor() and Input.is_action_just_pressed("jump"):
		position.y -= 1 # Ensures you dont collide with vertical platforms
		velocity.y = -JUMP_SPEED
Conclusion
There may be more methodologies for moving objects, but there are the most common ways of doing it in Godot. Most of these methods will also be applicable in 3D, as it is just a matter of adding another axis. Hope this article was of use to you. If interested, check out any of the other articles available on the site.