In this article I will be giving you steps to integrate Google Ads (Admob) using the new Android Plugin System, which was introduced with Godot 3.2. This new system makes it possible to integrate Google Ads without having to create new templates. But instead it makes it possible to automatically include plugins when you build the game for Android. Meaning we don’t have to rebuild any templates on a Godot version change. This also streamlines the process for integrating Admob into the game.
Before you continue, make sure you have done all the steps to make it possible to Export to Android. There is a tutorial available on this here that walks you through the process. Once you have done those steps you can come back to this tutorial.
Godot 3.2 was not fully released yet during the creation of this tutorial. Instead I have used Godot 3.2 RC2. Which you can find the download links for here. (Edit: updated link to latest version)
Install Android Build Template
Navigate to Project and select “Install Android Build Template” to install the Android Build Templates, which make it possible to load Android plugins.

Select install. A template gets installed to “res://android/build” this makes it possible to configure or customize the build by changing the contents in that path.

Set Custom Build SDK Path
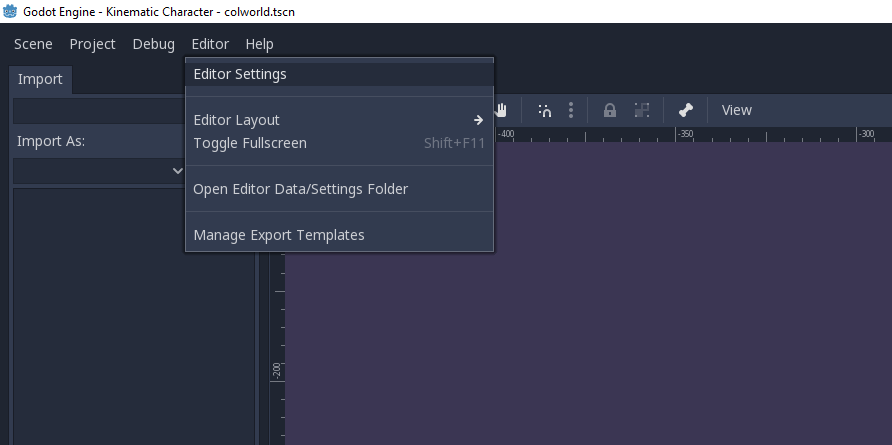
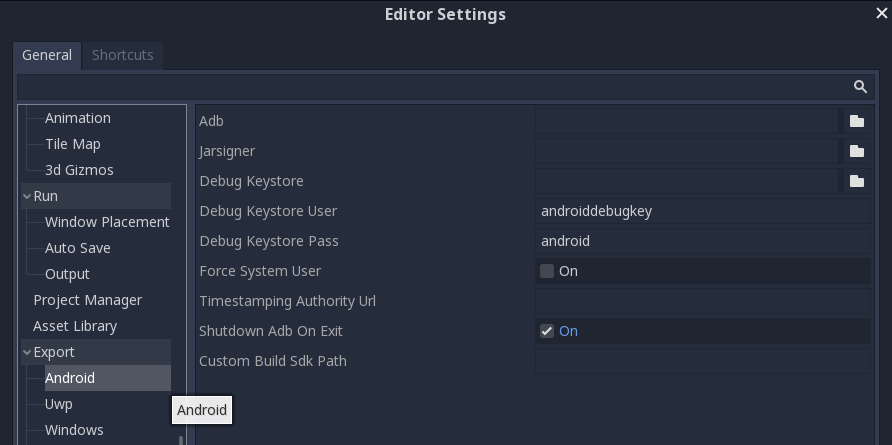
When you are on Godot 3.2 you can select a path for the Custom Build Sdk Path. On my device it is the following:
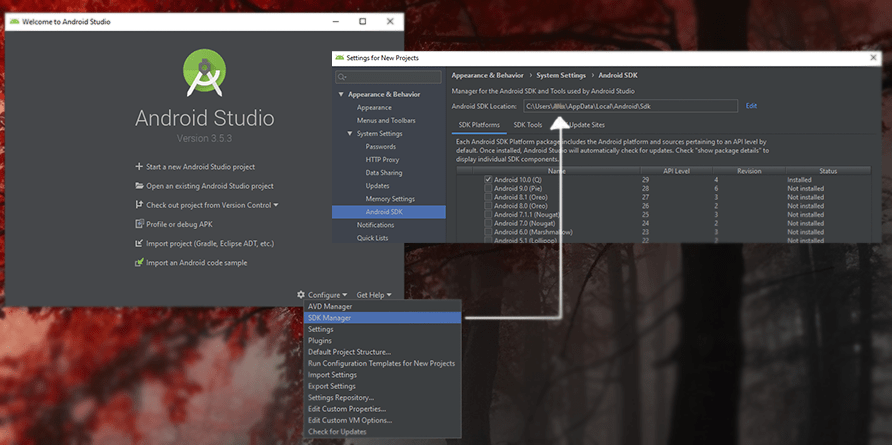
C:\Users\UserName\AppData\Local\Android\SdkIf you are unsure of your current path, you can go to Android Studio, select Configure, SDK Manager.
And you will be able to see your Android SDK Location.
Accepting the Android SDK licence
Open the Custom SDK path. And navigate to “tools\bin“
C:\Users\UserName\AppData\Local\Android\Sdk\tools\bin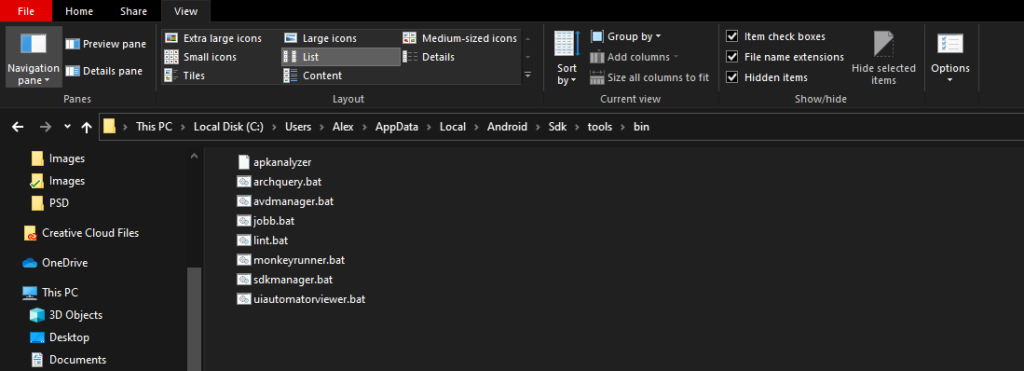
Select File, go to Open Windows PowerShell and select Open Windows Powershell as administator

Once you have powershell open, you run this command. Afterwards, read and decide on your own to accept the licences by pressing Y. You will have to accept multiple licences.
.\sdkmanager --licensesToggle the “Use Custom Build” option
To get started we have to toggle the Use Custom Build option in the Export menu. In order to get there, you have to go to go to the export options.
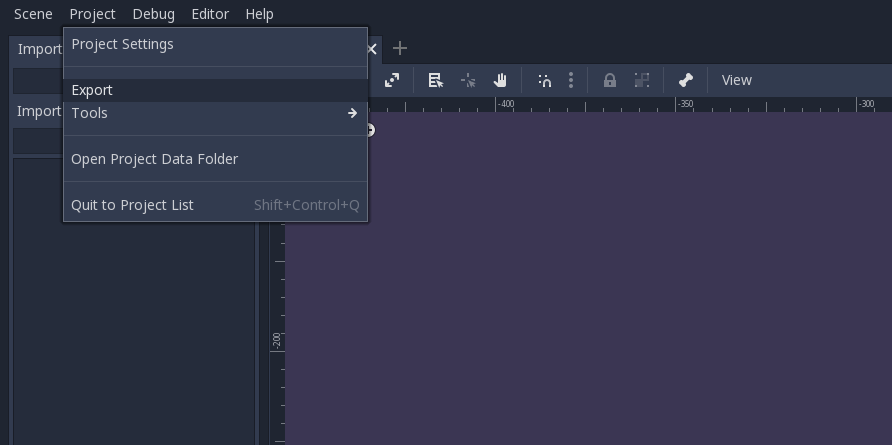
After you open the export menu, make sure “Runnable” is set on the current preset. This is now required if you want to do a quick run from the main screen. Afterwards, toggle the ““Use Custom Build”” toggle box.

Do a test build
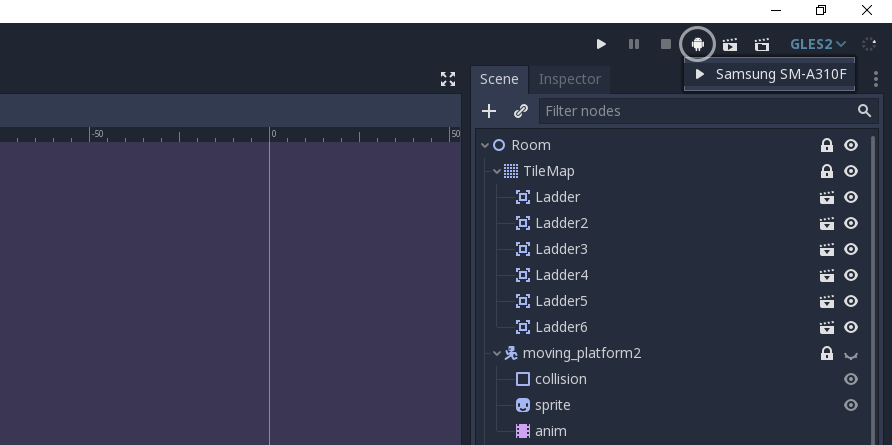
Before continuing, we test if a custom build is possible. In order to quickly do this, you can use the button on the top right corner. After running you will see a console window that may install multiple packages.
Installing the Admob plugin from Shin-NiL
To obtain the plugin can navigate here. The plugin currently supports banners, interstitial ads and rewarded videos. If you love what this developer is doing, make sure to give him a donation. You can find a Paypal link on the Github page.
Download the plugin
When you have navigated to the Github page, press “Clone or download” and “Download ZIP”. Once you have downloaded the file. Unpack it somewhere on your computer.

Place the admob-plugin folder in the Android folder of your project.
The quickest way of getting to the Android folder is by right clicking res:// and opening the folder named Android in your file explorer.

Add permissions in export options
Navigate to “Project” and select “Export”

On the right side, you will have to scroll down and find the “Access Network State” toggle box. And toggle it. Since Admob requires a internet connection.

Now you have to scroll down quite a bit more and toggle the “Internet” toggle box.

Set modules in project settings
In order for the Admob module to load we have to navigate to the Project Settings, go to the Android Tab. And set the module text to the following:
org/godotengine/godot/GodotAdMob

Testing if the module loads properly
Navigate to the zip folder that came from the Github website. And go to the demo folder.
Place the main.gd and main.tscn in the root of your project. Then you can set the main.tscn scene as the main scene to load upon startup. In case you have a pixel art project, the elements in the scene will be too big, so you will have to rescale the buttons and text to test it properly!
In order to do this you have to go to the project settings. By pressing on the “Project” button and then navigating to “Project Settings…”

And then you can set the Main Scene by going to “Run” in under the tab called “Application”

Afterwards, try to build and test the project on your mobile phone.

Global advertisement loader script
I’ve chosen to create a custom script that is based on the demo script from Shin-NiL. Reason for this is because I felt the script provided missed some features that are mandatory if you want to launch a game. Such as automatic connection retrying and settings for child directed ads. Even with these additions, chances are you may want to modify it more to your liking. You can find all the methods you can call on the admob object in the GitHub repository.
You can copy the code below and paste it into a script. I’ve called it admanager.gd but you can name it what you like. In order to make the script global, go to Project Settings>Auto Load>Browse for path>Set a name (I use admanager). This way you can call admanager.showInterstitial() ,admanager.showBanner() and admanager.showRewarded() from anywhere in your project. It will return true or false if it was able to show them. This script is just a starting point for you to expand upon.
# Adaption of Main.gd from Shin-NiL - Copyright (c) 2019 Shin-NiL
# https://github.com/Shin-NiL/Godot-Android-Admob-Plugin

extends Node2D

# Configure the script by changing the values below.

# Retry connection if fail, if set to 0 it wont retry.
var retryConnectionInterval = 8.0
var autoLoad = true

var useTestAds = true
var bannerDisplayTop = true

var testAdBannerId = "ca-app-pub-3940256099942544/6300978111"
var testAdInterstitialId = "ca-app-pub-3940256099942544/1033173712"
var testAdRewardedId = "ca-app-pub-3940256099942544/5224354917"

var adBannerId = "my official banner id here"
var adInterstitialId = "my official interstitial id here"
var adRewardedId = "my official rewarded id here"

var useBanner = true
var useInterstitial = true
var useRewardedVideo = true

#####################################################
# In case you want to use a specific content rating #
#####################################################

## Set this to yes to make the configurations below it apply.
var useContentRating = false
var childDirectedTreatment = false
var maxContentRating = "G"

# read: https://support.google.com/admob/answer/7562142?hl=en
# If child directed treatment is set as true, then it wont use the content
# rating. It will only serve appropriate ads.
# G: "General audiences."
# PG: "Parental guidance."
# T: "Teen."
# MA: "Mature audiences."


# Non Configurable variables

var bannerReady = false
var interstitialReady = false
var	rewardedReady = false
var admob = null

# Helpers

func _retry_connection_with_delay():
	print("Trying to reconnect after: " + str(retryConnectionInterval) + " seconds")
	yield(get_tree().create_timer(retryConnectionInterval), "timeout")
	_initialize_ads()

func _initialize_ads():
	var realAds = not useTestAds
	var instance = get_instance_id()

	if (!useContentRating):
		admob.init(realAds, instance)
	else:
		var childFriendly = childDirectedTreatment
		var rating = maxContentRating
		admob.initWithContentRating(realAds, instance, childFriendly, rating)

# Startup

func _ready():

	if(Engine.has_singleton("AdMob")):
		admob = Engine.get_singleton("AdMob")

		_initialize_ads()

		if (useBanner):
			loadBanner()
			get_tree().connect("screen_resized", self, "onResize")

		if (useInterstitial):
			loadInterstitial()

		if (useRewardedVideo):
			loadRewardedVideo()

# Loaders

func loadBanner():
	if admob != null:
		var id = testAdBannerId if useTestAds else adBannerId
		admob.loadBanner(id, bannerDisplayTop)

func loadInterstitial():
	if admob != null:
		var id = testAdInterstitialId if useTestAds else adInterstitialId;
		admob.loadInterstitial(id)

func loadRewardedVideo():
	if admob != null:
		var id = testAdRewardedId if useTestAds else adRewardedId
		admob.loadRewardedVideo(id)

# Showing the ads

func showBanner():
	if admob != null and bannerReady:
		admob.showBanner()
		return true
	return false

func hideBanner():
	if admob != null and bannerReady:
		admob.hideBanner()
		return true
	return false

func showInterstitial():
	if admob != null and interstitialReady:
		admob.showInterstitial()
		return true
	return false

func showRewardedVideo():
	if admob != null and rewardedReady:
		admob.showRewardedVideo()
		return true
	return false

# Events

func _on_admob_network_error():
	print("Network Error")
	if (retryConnectionInterval > 0):
		_retry_connection_with_delay()

func _on_admob_ad_loaded():
	print("Banner load success")
	bannerReady = true

func _on_interstitial_not_loaded():
	print("Error: Interstitial not loaded")
	interstitialReady = false

func _on_interstitial_loaded():
	print("Interstitial loaded")
	interstitialReady = true

func _on_interstitial_close():
	print("Interstitial closed")
	interstitialReady = false

func _on_rewarded_video_ad_loaded():
	print("Rewarded loaded success")
	rewardedReady = true

func _on_rewarded_video_ad_closed():
	print("Rewarded closed")
	rewardedReady = false
	loadRewardedVideo()

func _on_rewarded(currency, amount):
	print("Reward: " + currency + ", " + str(amount))

# Resize

func onResize():
	if admob != null:
		admob.resize()
